I walked into Hot Springs, NC on Day 17 of my 2013 Appalachian Trail hike. I found a cozy hostel, a welcoming populace (Wednesday night potluck at the community center!) and a great greasy-spoon diner that didn't skimp on the portion sizes. I ended up staying in Hot Springs for a day and a half, eating pizza, sampling a few local brews, and hanging out with hikers at the hostel. I don't generally hang out in town on thru-hikes. But I certainly enjoyed Hot Springs.
Not all trail towns are as idyllic as Hot Springs, though. Some towns (Kent, CT) have plenty of services but a terrible attitude. Other towns (Leadore, ID) have a great attitude, but very limited services. And once you get away from established hiking routes and trails, towns are frequently both unfriendly and inconvenient.
One section of the Hayduke Trail, for example, goes more than 300 miles between paved road crossings. Getting to town involves either a lengthy detour or a tough hitch down a dead-end dirt road. At the end of a similarly-sized roadless section of the Idaho Centennial Trail, the nearest "real" town is 80 miles away. Eighty miles! The Hayduke and the ICT are both admittedly fringey hiking routes. But we can push the envelope further. How about a thousand-mile loop of the empty spaces and looming ranges of Nevada, or an 800-mile ramble through the Mojave and Sonoran deserts? What if the best route - as far as scenic values and hiker experience is concerned - goes nowhere near anything that resembles a decent town or a plausible hitch?
The point is this: the need to stop into town once a week can, in some cases, be a major impediment to our enjoyment of a particular environment. But there's good news: we don't actually need to go into town in order to resupply. We can cache supplies in the backcountry instead.
Normally, caching is probably the least desirable way of resupplying. After all, it involves a whole bunch of driving to and from your cache site, before and after your hike. It involves having enough foresight to pack absolutely everything you'll need, weeks or months in advance. And it does involve leaving food unattended in the backcountry, which necessitates strict food-storage practices, as well as compliance with local regulations. All in all, it's a headache. But sometimes, it can be the best way, and allow you to hike a route that would otherwise be logistically impossible.
 |
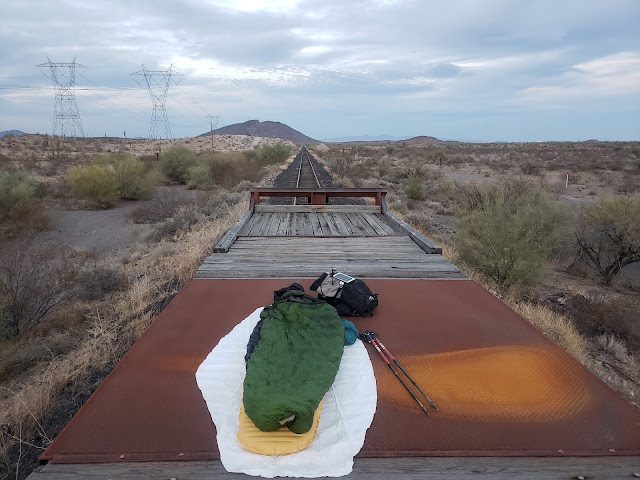
Prepping maildrops and caches. When appropriate, the latter make for a more pleasant resupply experience (IMO).
|
What is a cache?
Simply put, a resupply cache is a sturdy container filled with all the supplies a hiker needs, hidden in the backcountry. It requires extra work before and after the hike - you've got to place it before you begin the hike, and retrieve it after you finish. But in exchange, it's enormously convenient while on-trail - there's no need to get off route or go into town in order to resupply. To break it down into steps:
- Research your cache. Decide whether or not a cache is actually the best option for your particular resupply needs. Look up whether caching is legal in the area you’re planning to visit - and if so, what the applicable regulations say.
- Pack your cache. In addition to backpacking food, you'll want to include first aid supplies, extra gear,and more.
- Stash your cache. Drive to a convenient point along your backpacking route, and bury your odor-proof, bear-proof container in an inconspicuous & Leave-No-Trace compliant site
- Enjoy your cache. When you get to your cache site, take the afternoon off, eat your "town food", play Angry Birds on your phone while it's charging, wash your socks, and swap out gear. Pack up your backpacking food for the next section and re-bury your cache.
- Retrieve your cache. After you complete your hike, drive back to your cache site, pick up your box, and restore the area to a natural look.
1. Research your cache
It’s the first principle of Leave No Trace outdoor ethics - prepare and plan ahead. Caches require far more forethought than any other method of backpacking resupply. You really do have to think of everything - headlamp batteries, new socks, Leukotape, medications, SD cards for your camera - if you didn’t think of it beforehand, you’ll have to live without it for a couple weeks at a minimum. This may sound intimidating - and to be fair, cache-based wilderness expeditions require a greater skill set than traditional town-based thru-hiking, all else being equal. But that need not scare us off. After all, thru-hiking requires a greater skill set than backpacking, which in turn requires a greater skill set than day hiking. Cache-based expeditions are merely one logical step in our development as outdoorsmen or outdoorswomen, and just about anybody willing and able to put in the time/effort should be able to achieve mastery.
When to cache
In addition to the obvious (town is impossible or inconvenient to get to), there are a few other reasons one might want to cache in the backcountry:
- It's not safe to go into town. Many hikers aren't particularly comfortable with hitchhiking, especially when they're outside the cozy confines of a well-established trail corridor. And, of course, the Covid-19 pandemic introduced a wrinkle in the "hiker visits town" dynamic. Even though the threat is gradually receding as vaccination rates continue to improve, many hikers prefer to avoid town during the 2021 hiking season - and I certainly can't criticize that decision.
- You don't have time to go into town. Town stops are the single biggest time-suck on a long-distance hike. It can often take an hour or two to get a ride. And once you get into town, you've got to visit a restaurant, post office, outfitter, grocery store, and laundromat. And by that time, the sun's going down, and you decide to spend the night at a motel. By the time you get back on trail the next morning, the better part of a day has elapsed - and that's if you make your town stop quick! By contrast, with a cache, I can eat my "town food" leisurely, pack up my resupply, launder my clothes, and repair gear - all in about three hours and without feeling rushed.
- You don't want to go into town. The founders of the Hayduke Trail designed their route around the cache system - not because towns didn't exist, but because they believed strongly that the best Hayduke experience would be found in two months of uninterrupted wilderness. It turns out that not too many hikers have followed in their footsteps, opting instead for a more traditional hitch-to-town resupply strategy. Nonetheless, their impetus was well-intentioned: spending weeks or months in the wilderness, without going into town, can be a tremendously powerful and rewarding experience.
When not to cache
Caches can be very useful, but they're not always appropriate. Here are a few instances where I would not cache:
- Whenever it's illegal. You're generally prohibited from caching inside state or national parks. Exceptions exist of course, but generally the more protections that land has, the less likely that it's going to be appropriate/legal to cache on it. Land managers often distinguish between attended food storage (i.e. hanging your food bag near camp) vs unattended food storage (i.e. a cache). There are often different regulations for each. In many jurisdictions, unattended food storage is banned outright. Check the regulations for the park/forest/monument in advance.
- On/near established long-distance hiking routes. Caching can be a great solution to logistical issues, but it also comes with its fair share of ecological impacts - digging a hole, for one. It's not too big of a problem if one hiker does it on a DIY route in the middle of nowhere - but we probably don't need a couple dozen people all digging holes near the same trailhead. Thankfully, there's generally no need to cache on an established trail. Even the most hardscrabble of CDT trail towns, Leadore ID, has a few people who run shuttles for hikers to and from the trail crossing. That's very much welcome, since there's not too much traffic on that dirt road!
- In ecologically sensitive areas. It's completely inappropriate to cache in the high alpine or cryptobiotic desert environments. Areas with lush vegetation and high soil moisture are generally best - these areas will heal quickly once you've removed your cache.
2. Pack your Cache
I used to be pretty skeptical of caches. After all, they shared a lot of similarities with maildrops - similarities that I didn't particularly like. I was forced to plan my resupplies weeks or months in advance, without knowing exactly how my nutritional needs and tastes would change on trail. I couldn't bring string cheese - keeping it unrefrigerated for a week in your pack is no problem, but two months in a cache sounded like a recipe for food poisoning. And finally, I wasn't looking forward to not eating in a restaurant, not being able to wash my clothes, or missing out on any other town niceties.
In preparation for a 2020 Greater Yellowstone Loop hike, I started to research food cache strategies. One of the most insightful tips I got was from serial thru-hiker Buck-30, who'd done some water caching on a hike of the Desert Trail a few years ago. Along with the water caches, Buck packed himself heavy, but yummy food - fruit cocktail and a Diet Coke, in his case. This got the gears turning, and eventually morphed into my "Town-in-a-Box" concept.
Town-in-a-Box
The idea is this: when hikers visit town, we do a lot more than just buy six more days of backpacking food. We pig out at the buffet, compensating for the calorie deficit we've been running. We wash our clothes. We charge our phones. We swap out gear, sip a beer, and relax with some trashy daytime TV. If I'm going to opt for a resupply cache in lieu of a town-stop, then my cache has to serve most, if not all of those functions.
Let's take a walking tour of an imaginary trail town, stopping at each business.
- Restaurant. You may not be able to get a hot/fresh meal in the woods, but you certainly can pack yourself a bunch of obscenely heavy, bulky items that you'd never take backpacking. A couple cans of chili make a great snack. Ditto with snack-pack pudding cups, fruit cocktail, a 2-liter bottle of pop, or whatever else you crave. Depending on how long you're leaving your cache, and how deep it'll be buried, you can even get away with putting a few fresh fruits or veggies in your cache. How about burritos - tortillas, a can of chicken, a can of chili, a bag of shredded cheddar, fresh tomato, avocado, and onion? I bet that'll keep just fine for a week, buried underground at a constant 55F.
- Go big! The first time I tried caching town food, I didn't leave myself nearly enough and ended up hungry and miserable. The second time? I left myself a feast.
- Pack some luxuries. Hikers who typically go stoveless can leave a pot/stove/fuel inside their cache, so they can make a hot meal. Even hot/cooked ramen is a treat when you're used to biting it off the block. And of course, you can leave yourself a glass jar of spaghetti sauce and a container of parmesan with no care in the world for weight.
- Grocery store. It's possible to "go shopping" inside your cache - just
leave yourself a little extra food so you can pick and choose what you
want to carry. That way, if you're sick and tired of the Doritos after a
month of eating them, you can pack out the BBQ Lays instead. And if
you've been ravenously hungry and running out of food, you have the
option to bring both - more food than you originally thought you needed.
- Don't forget those non-food items that you typically buy at the store - toothpaste, headlamp batteries, ibuprofen, or athletic tape. You might not need all of it at any given resupply, but it's hard to say what you will and won't need. Anything you don't need can just be left in the cache. None of it will go to waste - you'll use it all eventually on future trips, just like with the extra food.
- Motel room. In addition to a soft bed, motel rooms offer hikers the chance to take a shower, charge their electronics, and veg out with House M.D. reruns.
- Consider leaving a sponge in your box so you can wipe yourself down/freshen up. It'll eliminate the worst of the grime. Same thing goes with any other personal care items (say, a hairbrush) that are too heavy or annoying to carry in your backpack.
- Bring a big battery bank. In addition to taking your phone from zero to 100%, you'll want extra juice so you can take care of the stuff you normally do in town - uploading photos to the cloud, paying your credit card bill, yakking with Great Aunt Edna for 45 minutes, or watching some bad TV.
- Before leaving home, check cell coverage maps (Gaia GPS offers layers for most major US carriers) to see if your cache location has cell service. Otherwise you'll have to bring a larger capacity battery on-trail (or a solar charger) so you can take care of all of your electronic entanglements atop a mountain where you actually have service.
- Tavern. Slip a couple delicious beverages of choice into your resupply cache. They won't be ice-cold, of course, but they do stay surprisingly cool if they're buried underground. This is particularly true in fairly cold climates, where soil temperature is fairly low. Fortunately, mountainous areas fit the bill.
- Post office/outfitter. This is your opportunity to swap out gear and to replenish supplies. Need new shoes or trekking pole tips? Leave yourself a pair. No longer need those microspikes? Leave them in your cache. In this way, with a little forethought, you can swap out your gear, always bringing the right tools for the season and environment.
- Socks, trekking pole tips, shoes, and bottles of Aquamira all have pretty well-defined lifespans. Plan conservatively, just in case conditions are a bit more rugged than you expected. If your shoes usually last 700 miles, consider replacing them around the 450-500 mile mark. If they fall apart earlier than expected, and you're not within striking distance of a town, you'll be very glad you planned to replace them as soon as you did!
- Consider leaving a sewing kit in your resupply cache (if you're not already carrying one in your backpack).
- Laundromat. For the vast majority of human history, washing machines didn't exist. Yet, we've usually avoided living in total squalor. I won't claim that "some soap and a sturdy plastic bag" gets your clothes quite as clean as an Electrolux, but it certainly does the job. At the bare minimum, it gets rid of the uncomfortable sweat crust that builds up on your socks - and let's be honest, that's the biggest reason you want to do laundry in the first place. Two caveats apply here though:
- Use biodegradable soap, and using as little of it as possible. My first attempt at trail laundry involved Dr. Bronners, and wasn't particularly successful in getting my clothes clean. My second attempt involved beefier soap, but it turned out to be really concentrated and probably wasn't the greatest for God's creation. The search continues for the perfect backcountry laundry soap. If you use one and are happy with it, shout it out in the comments so the rest of us can learn!
- Don't do your laundry next to a stream. Instead, get water from a water source (either a large jug in your cache, or a nearby stream), and do your laundry "Dundo-style", as Ray Jardine would say, far away from the water source itself. We don't want to contaminate a stream with a mixture of soap scum and foot funk. If there's no nearby natural source and you need to cache water, I'd expect to use about 2.5 gallons to pre-rinse, thoroughly wash, and rinse a typical hiker's load of socks/underwear/bandana.
The overriding message is this: a little extravagance goes a long way. There's no need to go ultralight or minimalist when it comes to caching supplies. It's okay to have a little more than you need. You need a little flexibility to account for unknowns on trail, and you need a mental break for the austerity that wilderness backpacking demands. Treat yourself. It's okay. And you're still using a lot fewer resources (and money!) than you would be on an in-town resupply stop.
We can't completely emulate the comforts and conveniences of town with a resupply cache. But with a little creativity, we can get pretty close. And it's certainly a far cry from the "barely enough food, crammed into a USPS flat rate box" sadness of an isolated post office in the middle of nowhere. Unlike that sad, pathetic maildrop, Town-in-a-Box is designed to be sustainable indefinitely. It's possible to hike for weeks or even months at a time without ever visiting a town, using the Town-in-a-Box strategy.
One final tip: trying to organize many caches at once can be daunting. Spreadsheets are essential to keep it all organized. And, unless you’re buying in bulk, you might find it easier to go shopping for just one or two caches/resupply legs at a time. That will help you increase the variety of foods that you put in your cache (different foods will look good to you on different days) and avoid the dreaded “aw-screw-it” apathy when you’ve been at the grocery store for two hours already and your cart is overflowing.
3. Stash your cache
Critter Safety
The most important consideration when caching supplies in the backcountry is keeping your food absolutely 100% safe from critters. It's your only way of staying fed for the next week. And, given that your food will be stored unsupervised, it needs to be very, very critter-proof to keep a fed bear from becoming a dead bear, or to stop determined squirrels from gnawing their way inside.
I use a three-part safety system to ensure that my food will be absolutely secure:
- Store all food and smellable items in odor-proof bags
- Put everything inside a hard-sided, IGBC-certified bear-proof container
- Bury the whole business 8-12 inches underground
The idea is this: if a critter can't smell my food, it won't have any reason to try and dig up my box. And if it does randomly dig up my box, it'll find it completely impenetrable. And the fact that it's well-buried means that a curious animal won't randomly stumble upon it, swat it around a bit, or run off with it. Put simply, with this method I can be 100% certain that my cache will be waiting for me when I get there, completely undisturbed.
Let's dig into each of these elements:
1. Odor-proof bags. The name of the game here is a fleet of OPsaks - heavy-duty, resealable plastic bags designed to be 100% air and odor-proof. In the past, I’ve been a little skeptical of OPsaks. They don't hold up very well to the rigors of backpacking. Backpackers tend to abuse OPsaks - opening them and closing them constantly, crumpling them up, jamming them to the brim with food. After a week or two of this harsh treatment, the seals start to break, seams begin leaking, and suddenly your odor-proof bags aren’t very odorproof anymore.
On the other hand, OPsaks excel at keeping things fully air and odor-proof in static environments like a cache. Just buy fresh bags, put everything with a smell in them (including medication, chapstick, toothpaste, and any other smellables), and put them inside your cache boxes. Not only will they contain odors, but they'll keep your chips and cookies and other food fresh for weeks. You can even pre-open and crush a bag of chips (to save space), and after a month in an OPsak, they'll still be perfectly crunchy.
2. Hard-sided, IGBC-certified container. The honest truth is that 95% of the classic backpacking terrain in North America is black and/or grizzly bear terrain. Everybody knows that the Sierra Nevada and Yellowstone are bear habitats. That much is obvious. It's far less obvious that large parts of Florida, the ranges of the mid-south (Ouachitas/Ozarks), and even many of the desert ranges of the Southwest (Superstitions, Mazatzals) are bear habitats too - but they are! Unless you have solid and bulletproof information that you’re not in bear habitat (e.g. Catalina Island, where bears absolutely, definitely do not live), you should assume that you're in bear territory, and plan accordingly.
It is therefore imperative that a cache be fully bear-proof. That means that it must be in a sturdy, hard-sided container (no Ursacks!). But more than that, the container should be certified as bear-resistant by the Interagency Grizzly Bear Committee. An IGBC-certified container is a legal requirement for unattended food storage on many public lands. Not all hard-sided containers are IGBC-certified. Most coolers, for example, are not - and even if they are, they must usually be bolted or padlocked shut in order to be in compliance with regulations. A full, constantly-updated list of IGBC-certified products can be found here.
Even in the tiny minority of places where bears do not exist (low-elevation deserts, certain islands), you should take basically the same precautions. On one occasion while hiking in the low desert, I decided to use 5-gallon buckets instead of ammo boxes. To my horror, one of the caches was nearly gnawed through by a desperate rat! Not only did some poor rodent have to visit the dentist because of my actions, but it very nearly got into all my food, which would have been disastrous. The same thing applies with water jugs - animals will smash, bend, and otherwise mutilate gallon jugs of water in order to get some of that precious liquid. So even when you're not in bear country, it's wise to take the same precautions anyhow, just to avoid problems with other wildlife.
What kinds of IGBC-certified containers work well for caching? There are a few contenders:
- Bear Canisters. There's an obvious advantage to bear cans - many backpackers already own them. Despite that, though, I find that bear cans aren't actually ideal for caching. They're simply too small. Any PCT hiker who's tried to cram 8 days of food into a bear can in the Sierra will attest to the fact that they tend to fill up very quickly. And once you start adding town food, replacement gear, and all your other Town-in-a-Box supplies, you'll find that a bear can probably isn't big enough.
- Coolers. Most coolers are not IGBC-certified, but a few are. If you've got an IGBC-certified cooler, it can work well, as long as it's padlocked or bolted. The IGBC product list will generally detail the correct way to use it. But if you're planning a long trip with multiple resupply caches, those roto-molded coolers quickly become economically impractical.
- Ammo Cans. Fortunately, there's one product on the IGBC list that's cheap and can be purchased en masse - the Army-surplus ammunition box. Ammo boxes themselves are NOT IGBC certified, but with a couple easy modifications - a couple lengths of U-channel bar and some bolts, along with a razor saw and a drill with carbide bit - you can make a huge, fully IGBC-certified container at home. You can expect to pay maybe $15-25 per ammo box, plus a couple bucks for the supplies needed to modify it. They come in a variety of sizes - commonly identified by the size of the ammunition stored within. Larger numbers correspond to smaller boxes. The "standard" 50-caliber box is too small to do Town-in-a-Box - it barely fits two days of backpacking food! The 40mm box is sufficient for about 3 days of food, plus Town-in-a-Box. The big boy, the 20mm box, can pretty comfortably hold up to 8 days of food, plus Town-in-a-Box. It's my preferred choice for most caching.
3. Bury your cache underground. You'll probably want to bury your cache anywhere that there are large animals capable of dragging away your food cache. Burying it keeps it to be out-of-sight and out-of-mind for critters. Yes, animals can dig, and maybe they'll be curious about your freshly-dug hole. But if burying our poop 6-8 inches deep is sufficient to keep animals from messing with it, then burying our odor-proof food cache least that deep (I recommend 8-12 inches) will probably be similarly effective. And I probably don't need to remind you that poop is not odor-free! Except mine, of course. :)
In order to dig a proper hole, you'll need the following:
- A good shovel. We're talking a real shovel, not your poop trowel. Even with good site selection, you'll invariably have to dig out a big rock or cut through a few roots. That’s a job for a shovel that you can really stomp on and use some force with. Thankfully, there's no need to leave the shovel at your cache. Once you've placed your cache and filled the dirt back in the hole, it's easy enough to dig back up with bare hands - even after a couple months of letting the dirt settle and harden.
- Plenty of patience. Your hole will need to be at least twice as big as you think. The problem is, we dig round holes, and our ammo cans are rectangular. So we'll need to dig a lot deeper and wider than it appears at first glance. Be patient, and give yourself plenty of time to complete the work.
It should be noted that there are some drawbacks to caching underground - namely, the LNT impacts of digging a hole. In most cases, I consider those drawbacks to be "worth it" in the name of greater food security. There are certain exceptions - most notably in truly arid desert environments where there aren’t bears or any other animal large enough to mess with a IGBC-certified and smell-proof container.
And keep in mind - caching is only recommended on super obscure/DIY routes, not on the Pacific Crest Trail. One hole in the middle of the woods isn't a big deal to me, provided that it's dug in a sustainable location and that you re-landscape the area to a natural appearance afterward. But if you've got a thoughtful, contrary opinion on the matter, I'd love to hear it in the comments.
Human Safety
Two-legged critters are more likely to cause problems for your food cache than the four-legged critters are. Mere weeks before I began my 2020 Greater Yellowstone Loop, the treasure of Forrest Fenn was finally found. For years, it was strongly suspected to be in the Greater Yellowstone Ecosystem - not too far from where I was burying caches! Needless to say, I was relieved that fewer people would be poking around random trailheads in the GYE, looking for buried treasure.
On another occasion, I neglected to hide a resupply cache underground, as it wasn't in bear country. But I hid it a little too close to town, in the litter-and-creosote wasteland where people ride roughshod on ATV's. When I got to my cache location a few weeks later, my bucket had vanished without a trace. I hope the thief really enjoyed those crushed potato chips and Teddy Grahams.
The point is this: curious or malevolent humans can pose a slight risk to your cache in the backcountry. Here are a couple security tips I've learned the hard way:
- Avoid well-traveled areas. It's probably not a good idea to cache in the vicinity of a busy trailhead. Maybe, if you've got a couple mile roadwalk down a dirt road away from the main road, go half a mile down the dirt road and then cache well off the road in a place only you can find it. GPS tag the location and take a picture to be certain!
- Seriously, bury your stuff underground. People are lazy, and on the odd chance that they spot your hole, will probably lose interest if they dig down a few inches and find nothing.
- Disguise your cache site as a dog grave. I like to print off a photo of a random poodle from the internet and write "RIP Fluffy" on it. Bury it a few inches down in the hole, so if anybody starts digging, they'll promptly find the epitaph and stop. Nobody wants to dig up a rotting pet carcass.
Proper Site Selection
As alluded to earlier, it's important to choose a good cache burial site. Here are a few tips I've picked up:
- If you wouldn't poop there, you shouldn't cache there. It's easy to get "lazy" with your caches - a fully loaded Town-in-a-Box will be pretty heavy, and hikers aren't exactly known for their upper body strength. But take the extra time and walk a few tenths away from the road crossing or trailhead, so you're not in/near a high-foot-traffic area. The LNT standard of 200 feet from trails/roads/water is a good start, but I'd probably go with 200 yards rather than 200 feet in this case. A large cache hole is a bigger impact and more unsightly than a small cathole, so it's best to cache well away from where other people will be venturing - both for the security of your cache and out of respect for other visitors
- Lush and green is your friend. I like burying my cache in areas of high soil moisture. In addition to keeping your stuff nice and cool, the land will recover more quickly in a greener, wetter environment. On a Greater Yellowstone Loop, my latter caches - which had been buried for close to 2 months by the time I reached them - had little green shoots already growing out of the dirt I'd overturned. Within a couple years, the site will become indistinguishable from its surroundings.
- Flood plains offer easy digging. Even in areas that aren't particularly rocky, there are rocks everywhere. And when you start digging holes, you'll find more rocks than you ever knew existed. I've found that flood plains of creeks and rivers make for the best digging - there are simply fewer rocks there. If it's an area that only floods in the springtime, and you're caching in the summer, you probably don't have to worry about floods sweeping away your Teddy Grahams. Just make sure it's a broad floodplain so you're not caching too close to the watercourse itself.
- Disguise your burial site. After you finish burying your cache, grab some leaves/rocks/forest duff and try to make your site look natural. There will still be a leftover dirt pile nearby, of course, but you can disguise that too with a little additional landscaping. I generally leave two small sticks atop the burial site in an L-shape - recognizable enough to tell me exactly where to dig, but subtle enough not to attract attention from strangers who happen to stumble across the site.
- Tag your cache site with GPS. After a few months, memories fade. Take a photo, save the exact GPS coordinates on your phone, and make sure to send the coordinates to your emergency contact. Perish the thought, but if the worst case scenario happens and you disappear, SAR can dig up your cache and determine whether you made it this far or not.
 |
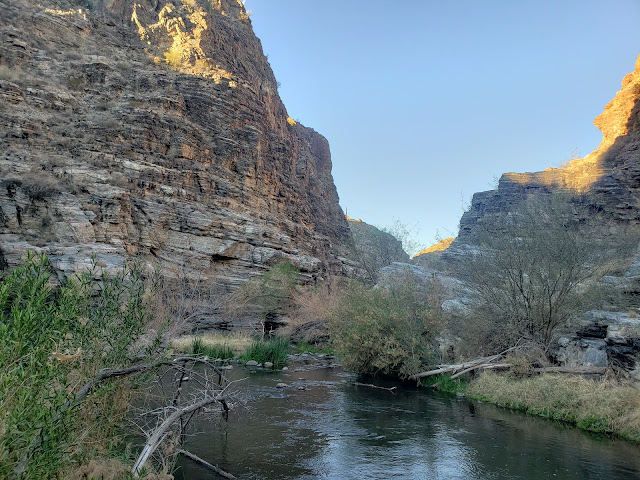
Green and lush. Any trace of the burial site will quickly disappear in this environment.
|
4. Enjoy your cache
This is the fun part. There’s absolutely nothing better than rolling up to your cache and being able to immediately dive head-long into a large pile of food and drink. You don’t have to wait for a ride or slow service at the restaurant. And, if you’ve done Town-in-a-Box right, you’ll be able to stuff yourself to the gills.
A few tips for maximum effectiveness:
- Plan ahead. I generally budget about three hours for my cache activities, including a healthy dose of relaxation. Given that caches are usually relatively close to a road of some sort, I try not to get there too late in the day - otherwise I’ll have to camp close to the road and/or night-hike. I find that early afternoon is best. After all, I’ve got to do laundry, and I want it to dry in the warm sunshine.
- Start charging ASAP. Unless you’re carrying a solar charger and/or auxiliary battery in your backpack, the cache is your only opportunity to recharge your phone or other electronic toys. Sit down, take a couple swigs of pop, and then plug your phone into your battery bank right away. By time you’re done with your “town chores'', the phone will be ready to go.
- Do all of your town chores. It can be surprisingly hard to keep track of all the things you have to do at a cache - be it repairing ripped gear, doing laundry, or swapping out gear. I suggest making a list ahead of time so you don’t forget anything. There’s nothing worse than getting five miles down the trail and realizing that you could have jettisoned your microspikes at the last cache - or worse, that you forgot your mosquito headnet for this next section.
- Relax. Long-distance hiking may be a leisure activity, but darned if that hobby doesn’t feel like work sometimes, particularly when you do it all day every day. It’s okay - necessary, even - to just hang once in a while. A few ideas to increase the enjoyment of your cache day:
- Watch a show on your phone. I won’t tell if you cry when they shoot Old Yeller.
- Do a little fishing. Roads tend to follow rivers, which means there’s a decent chance your cache site isn’t too too far from water. Pick up a cheap spinner pole at a thrift store, hide it near your cache box, and spend the day pulling little brookies out of the stream.
- Play a game. Again, the thrift store is your friend. Wade past the 91 copies of Trivial Pursuit to find a board game, leave it in your cache box, and enjoy settling Catan or whatever.
- Re-seal everything properly. If anything, a cache is a bigger bear magnet after it’s been emptied. You’ve just swapped out food for your rotting trash, which is far more pungent than the food was. Leave everything smellable sealed back inside your OPsaks, safely locked in the bear-proof container, and re-buried.
5. Retrieve your cache
It’s vitally important to pick up a cache promptly upon completion of your hike. If it’s not picked up, it’s mere litter, and negates all the good work you did to make it sustainable and critter-proof in the first place.
You will want to take some time, after you dig up your cache, to re-landscape the site to a fairly natural appearance. In addition to filling in the hole, I recommend spreading forest duff, sticks, and leaves. Try to spread around the inevitable residual dirt pile, and generally do your best to make it look like you were never there - in other words, leave no trace! You won’t be completely successful in this regard, but if you do your best, the site will largely recover within a year or two.
To reiterate - site selection matters. If you’re digging in a drier place, or one with sensitive vegetation, your impacts may last decades. If you’re digging in a green, lush place with quick-growing plants, the impacts will be more short-lived.
*********************************************************************************
Food caching isn’t always - or even usually - the best or most appropriate choice for backpackers. But on extremely remote, DIY routes, it’s a useful part of a hiker’s toolkit. There are certainly many approaches to take to caching. In this guide, I could certainly be accused of overthinking it. But I’ve aimed to get hikers thinking outside the flat-rate box - and hopefully to inspire them to create a caching strategy that works well for them. Get out there, experiment a little, and report back! I’d love to hear other perspectives - please share your experience in the comments or ask a question!
 |
Backcountry top-loader washer in action. Put the lid on before agitating! I don't recommend a plastic bucket anymore - a rodent nearly gnawed through one of my buckets on this trip.
|